
12 Week Cycling Schedule
3/18 - 6/7
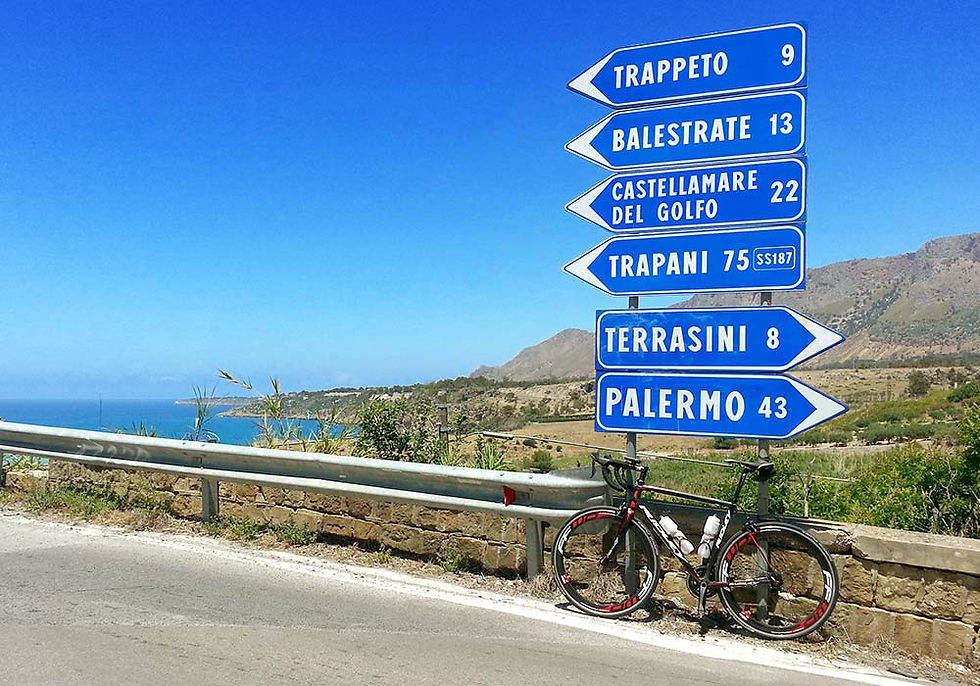
Whether you're a beginner or an experienced cyclist, all are welcome to join in Terrier's free 12-week training even if Sicily is not in your plans. We will cover everything from building endurance and strength to improving your bike handling skills. Our program will also include tips on nutrition and injury prevention to ensure that you are fully prepared and ready to take on this exciting journey. And if you're still dreaming of cycling across Sicily, taking in the beautiful scenery, and experiencing the rich culture and history of the island, just sign up. Seriously, you're not getting any younger, and stop making "work" an excuse. Life goes fast, do it while you can still ride a bike so you don't have to do it in a bus.
1. ANYONE can do this, but be consistent and execute the workouts. Unlike any other company offering cycling trips, Terrier has developed this training schedule to give you every opportunity to have a successful 300-mile ride across Sicily.
2. Plan to ride outside as the weather warms & have your bike on a trainer. Spin bikes are OK but you will need to do the rides outside too.
3. Reminder, the entire schedule is free to follow but if you would like to be coached LIVESTREAM, sign up for a class. There is a link in each day's workout when there is a livestream option.
4. The schedule is listed in two-week blocks.
5. If you feel tired, sore, or lazy and want to skip a workout? I don't care, get on your bike and ride it. You don't have to feel good to have a good ride.
Week #1
Test/Base
Week #2
Base/Drills

Week #3
Base/Strength
Week #4
Base/Recovery
6.00
1.25
.45
5.25
7.00
6.05
.15
.20
hours
# of rides
# of strength
6.25
4
2
hours
# of rides
# of strength
7.25
5
2
hours
# of rides
# of strength
8.00
5
1
hours
# of rides
# of strength
5.25
3
2
Week #5
Base/Skill
hours
# of rides
# of strength
9.00
5
2
1.50
4.00
3.50
hours
# of rides
# of strength
11.00
6
1
Week #9
Base/Tempo
8.00
2.00
.50
.50
Week #6
Base/Strength/Drills
hours
# of rides
# of strength
9.5
5
1
8.00
1.00
.20
.10
hours
# of rides
# of strength
9.50
5
1
Week #10
Base/Strength/Drills
.25
1.50
2.00
5.50
.25
Week #7
Base/Strength/Skill
hours
# of rides
# of strength
10.5
6
0
2.30
.40
.20
7.00
hours
# of rides
# of strength
8.50
5
1
Week #11
Peak
.25
4.00
2.00
1.00
.25
Week #8
Base/Recovery
hours
# of rides
# of strength
5.0
3
1
.50
.50
4.00
hours
# of rides
# of strength
6.00
4
1
Week #12
Taper Sicily
3.40
1.00
1.00
.20
Base Builder (BB)
Objective:
-
Expand endurance of cardio and muscular systems
-
Increase your ability to ride longer, more comfortably
-
Improve pedaling efficiency/technique
-
Strengthen posture and comfort
-
Improve your HR management skills
Characteristics:
-
Consistent revolutions at one specific Aerobic Endurance or Aerobic Strength heart rate (75% to 80%)
-
Smooth transitions between positions and terrains
-
Takes mental attention not to drift away
-
Class feels “longer” as structure is less diverse
Aerobic Power (AP)
Objective:
-
Increase capacity of muscular and cardio system
-
Raise your ability to ride stronger and harder
-
Generate sustainable power
Characteristics:
-
Progressive intensity throughout class
-
Intensity: Aerobic Endurance to Threshold (HR 75-85%)
-
No or limited recovery/breaks
Anaerobic Power (AnP)
Objective:
-
Expand cardiovascular and muscular system capacity at anaerobic level
-
Train ability to recover and re-engage
-
Improve your ability to boost power and temporarily sustain extreme intensities on a ride
Characteristics:
-
Intensity may exceed Anaerobic Strength (HR 95%)
-
Full recovery between intervals (HR 65% or lower)
-
Resistance from moderate to very heavy (5 to 9) combined with high cadence
-
Requires strong cardio and muscular condition
Perform Max (PM)
Objective:
-
Perform at maximum of cardio and muscular system that is sustainable for the duration of the class
-
Improve your ability to ride under race conditions
-
Test of fitness
-
Exploration of current personal limits
Characteristics:
-
Physically and mentally most challenging work-out
-
Intensity ranges from Aerobic Strength level and up, average is likely near Threshold
-
No recovery built in class structure- take Active Recovery as needed
-
Requires recovery day or easy ride/class
R&R (RR)
Objective:
-
Refresh and recover; relaxation for body and mind
-
Maximize benefit from preceding work-outs
-
Refresh muscles through increased blood circulation
-
Reduce tension and release lactate acid from muscles
Characteristics:
-
Light to moderate resistance at fluent cadence
-
Mental state is “intake” of energy vs. exerting power
-
Intensity is at recovery levels (HR 65% and below)
-
Requires patience for most A-type individuals
Mix
Objective:
-
Diversification of cycling work-out routine by combining elements of Base Builder, Aerobic Power and Anaerobic Power in one class
Characteristics:
-
Vary during class depending on elements
-
Diver and entertaining
Entry
Objective:
-
Learn the fundamentals of cycling, including the basics of shifting and gearing
-
Understand proper bike form and technique
-
Become familiar with watts and RPM
-
Have fun and get a great workout in
Characteristics:
-
Varying combinations of the following
-
Rolling hills to practice shifting and gearing
-
Out-of-the-saddle climbs
-
Consistent RPM work
-
End-of-the-class competitions
XPress
Objective:
-
Leans towards more toward shorter threashold intervals with many repetitions
-
Improve your Anaerobic Threshold
-
Test of fitness
-
Exploration of current personal limits
Characteristics:
-
Shorter 45 min class but a very challenging work-out
-
Intensity average is likely near Threshold
-
Recovery scheduled between intervals
TERMS & ETIQUETTE
1. Safety is the first priority. ALWAYS wear a helmet. Strap should be snug around your chin and helmet should be sitting forward on your head. Wear proper cycling clothing and always expect the unexpected with the weather.
2. Be sure your bike is in perfect running order before beginning your ride. Make sure tires are pumped to the proper recommended PSI and no breaks are rubbing! You have spare tubes and a patch kit, a pump or 2-3 CO2’s, properly filled water bottles, food, ID, money & a credit card and know how to change your own flat.
3. Have enough food and drink to get you through 2 hours of continuous riding.
4. Ride with the flow of traffic and always stay as far to the right as is safe. Always ride in a single file line unless the bike lane is clearly wide enough for a double-pace line. Use the common phrases when leading and riding in a group.
• Slowing - When someone yells out "Slowing", this means that there is something that is causing the pack to slow down. This can be anything from a light, a slower pack of bikes, and a car up ahead. In any event, prepare to slow down. Tap/feather your brakes and repeat the yell "Slowing". This is to indicate to others that you've heard them and you are also slowing. This will also alert those behind you that you are slowing down.
• Stopping - When someone yells out "Stopping", this means that there is something that is causing the pack to stop. This can be anything from a light, a slower pack of bikes, a stop sign or a car up ahead. In any event, prepare to stop. Tap you brakes and repeat the yell "Stopping". This is to indicate to others that you've heard them and you are also slowing to a stop. This will also alert those behind you that you are slowing to a stop. It's VERY important not to slam on your brakes especially if there are others behind you!!
• Hold your line - When someone yells, "Hold your line", this means that you need to stay in a straight line as best you can. In most cases, the person yelling this out to you is attempting to pass. If you swing out or if you don't keep your bike steady, you could cause the other bicycler trouble.
• On your Left - When someone yells, "On your Left", this means that they are passing you on your left. Let them pass as they have the right of way. You should never hear "On your Right". That is, a bicycler should never pass on the right. However, there are many bicyclers with varying experience. Be on the look out for those that will pass on your right. If someone does this, kindly remind him or her that they should pass on the left. Also, it is common courtesy to say "Thank You" to the person yelling "on your left". This indicates to them that you've heard them.’
• Car Up - When someone yells, "Car Up", this means that there is a car up front. It is intended to be a verbal caution indicating that a stop may be necessary. If you hear this, repeat the call so that others know that you are aware of the vehicle up front. It is also common courtesy to repeat this so that others behind you also know about the car.
• Car Back - When someone yells, "Car Back", this means that there is a car up back. It is intended to be a verbal caution indicating that a stop may be necessary. If you hear this, repeat the call so that others know that you are aware of the vehicle is behind you. It is also common courtesy to repeat this so that others behind you also know about the car.
5. Do not go into aerobars when riding in a group. Even if you are leading the group stay out of the aerobars. Riders must have control and riding in aerobars does not allow it.
6. Always ride in as straight a line as possible and avoid making any sudden moves. Signal before making any turns and always glance quickly behind you to make sure other riders and cars are not in your way.
7. Be courteous to other riders and share the road. We all ride fun and fitness, it’s not always about racing!
8. Call and point out any rough road or objects in the road that might cause a problem for cyclists. Riders at the front of the group are responsible for ensuring that riders behind them are aware of road conditions. Short commands like "HOLE!" or "WATCH THAT!" or "GRAVEL!" are usually the most clear. When possible, point to the obstacle or road condition. Pass on any warnings you hear you so that the whole group ride gets the message. You are the eyes and ears of the riders behind you.
9. Exercise particular caution when eating or drinking on your bike in a group ride. Make sure you keep your bike moving at a steady pace and in a straight line while eating or drinking. Move to the back if you are not comfortable doing this in the group.
10. Do not overlap wheels with other riders. Be aware of the other cyclists in the pack. When drafting, be sure to maintain enough distance between your wheel and the wheel of the rider in front of you so as to avoid bumping. If you are new to drafting, follow about one wheel-length behind. Do not become so absorbed in watching the wheel in front of you that you lose awareness of road conditions or riders around you. Be sure that you are always looking ahead.
11. Up Hills. Avoid following a wheel too closely. Many riders often lose their momentum when rising out of the saddle on a hill, which can cause a sudden deceleration. This can often catch a rider who is following too closely, resulting in a fall from a wheel touch.
12. Down Hills. Give more space between bikes and do not hit your breaks! Heavier riders will be able to coast, as the lighter riders will need to pedal slightly to keep pace. Groups tend to break up going down hill but re group once you are back on the flat road.
13. Come to a complete stop at all stop signs and red lights. If you are stopped at a red light, wait until the light changes to green before proceeding, even if it seems clear or safe to go against the light.
14. Hand Signals. Hand signals for turning and stopping are as follows: Left are straight out to signal a left turn. Left arm out and down with your palm to the rear to signal slowing or stopping. And, for a right turn, put your right arm straight out.
15. As much as possible keep the group riding together. If you are just a bit behind the group, work a little harder to catch up and get back in the draft. If you are just slightly ahead of the group, drop your pace a bit so that you fall back towards the group.
16. At the start of the ride listen to the objectives of the ride and planned pacing, as described by the ride leader. Respect the plan by riding at the appropriate pace at the appropriate time, so that the group keeps it overall cohesion. Most rides begin with warm-up segment. Be sure to stay with or behind the group leader during this segment even if you consider the pace too easy.
17. Leave a Gap for Cars. When riding up hills or on narrow roads where you are impeding faster traffic, leave a gap for cars between every three or four bicycles. This will allow motorists to take advantage of shorter passing intervals and eventually move piecemeal around the entire group.
18. Move Off the Road When You Stop. Whether you are stopping because of mechanical problems or to regroup with you companions, move well off the road so you don't interfere with traffic. It is usually best for the lead rider to pull forward in the stopping area and for other riders to pull in behind the rider in front of them. When you start up again, each cyclist should look for, and yield to, traffic.
Commonly used cycling terms
Hoods- Covers of the brake handles.
Drops – Lowest part of you handlebars.
Tops- Handlebar closest to the stem.
Horns – The tip of your bars on a tri bike.
Mash- Push a big gear.
Big Ring – Large ring in the front (usually a 53)
Small Ring – Small ring in the front (usually a 39)
Cog – Rear cassette (9 or 10 speed)
Spin – Easy pedaling in an easy gear